The floating docks, ramp and support
trailers are designed to allow easy removal and installation that can
be accomplished safely by two people and quickly by three or four
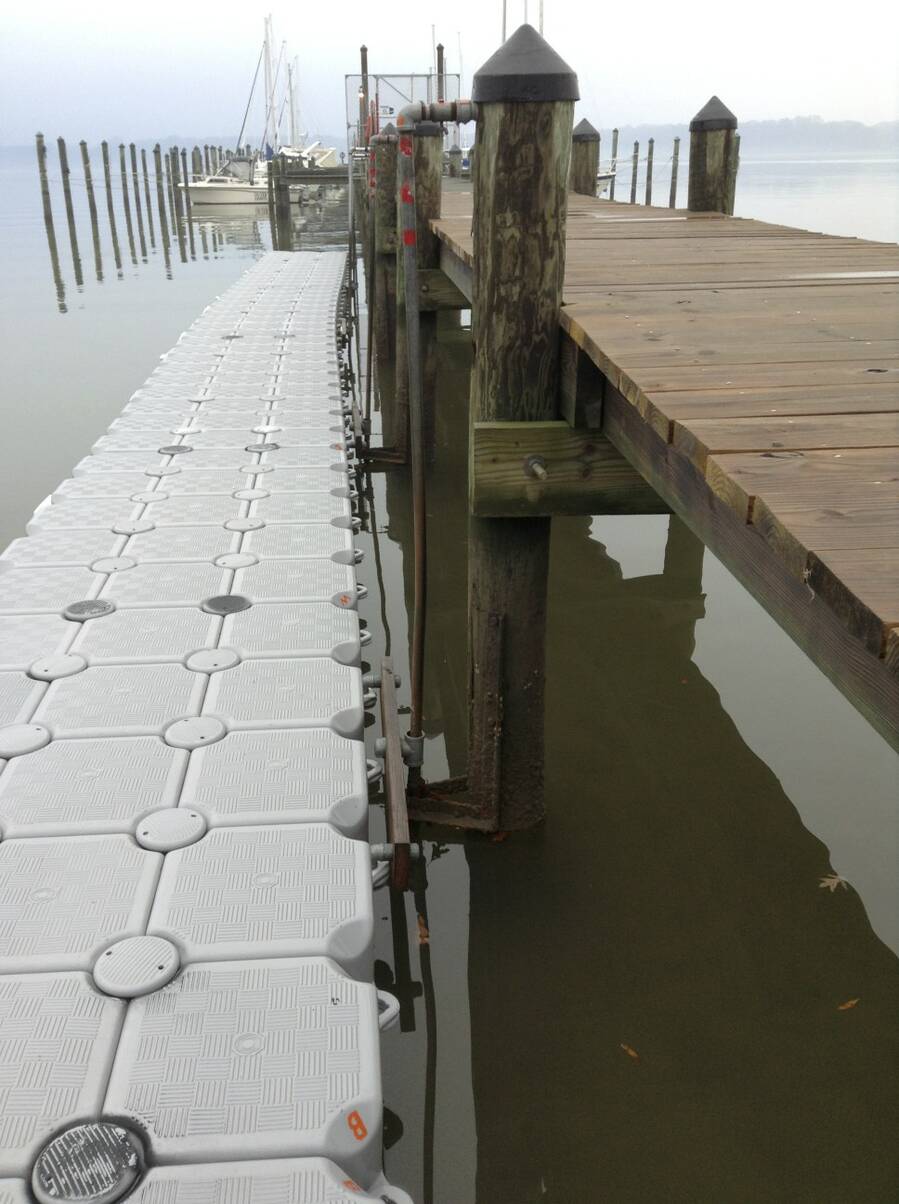
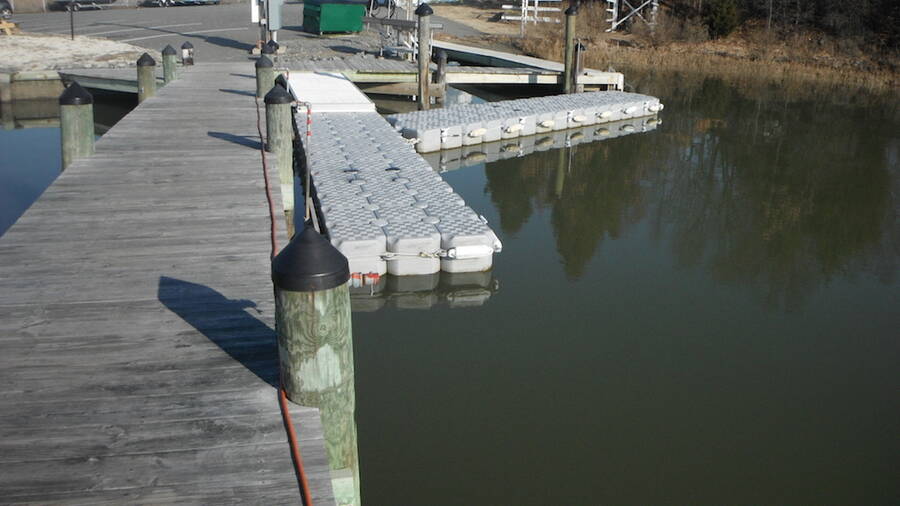
people. The dock is configured for summer use with all segments installed. During winter
most of the dock is removed to reduce damage risk to dock during periods when member activity
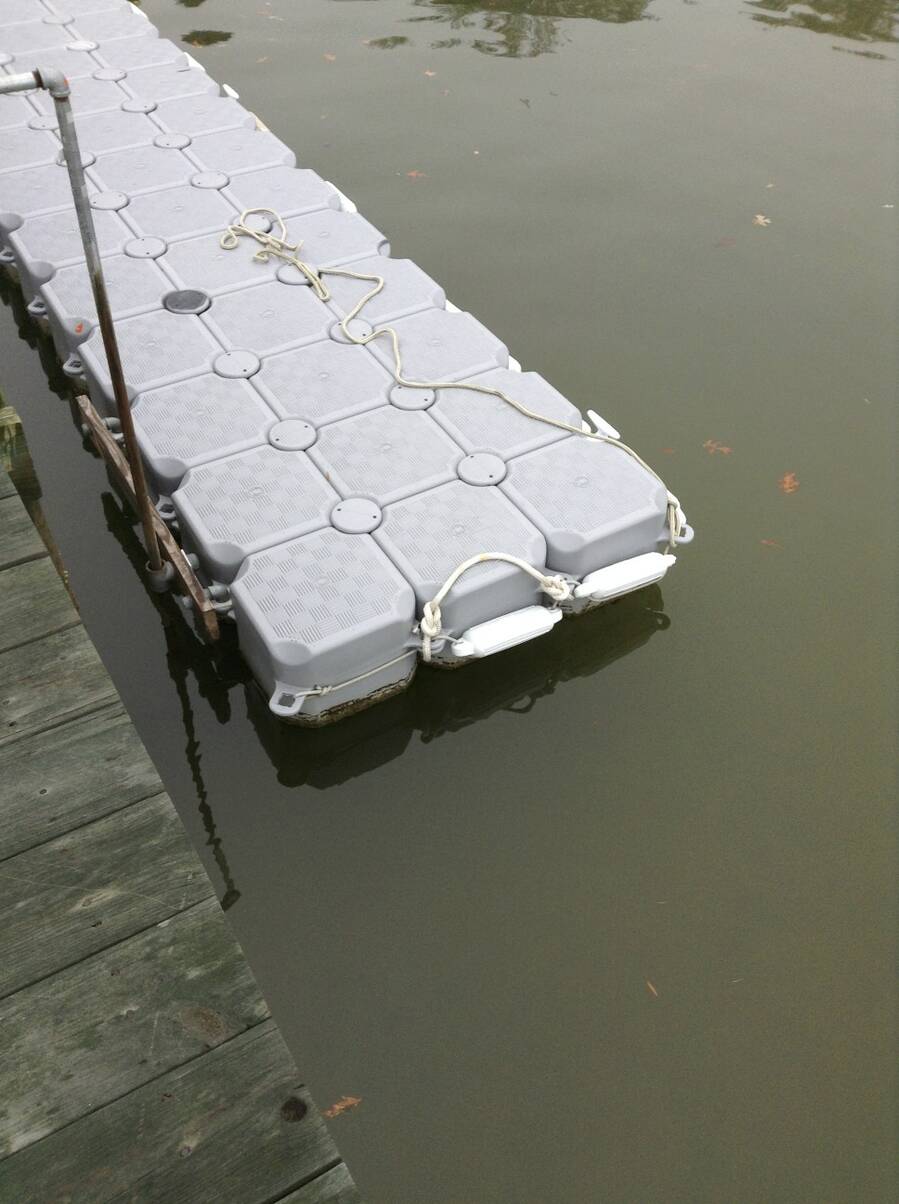
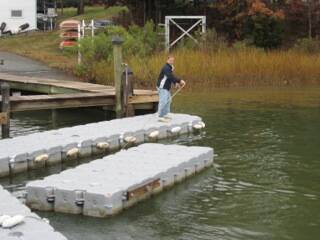
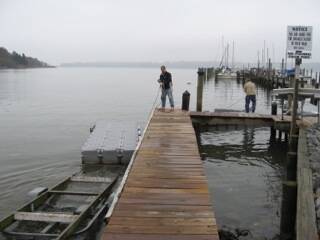
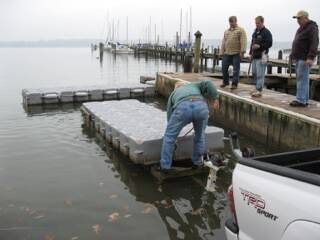
is minimal. Below are photographs of summer and winter configurations.
Summer ConfigurationWinter configuration
The following diagram shows
the complete summer configuration with the piling pipe numbers shown
in black and the dock section splits shown in orange. The “W”
split is the winter split.
Floating Dock Diagram
Complete removal or installation of the
docks should take around an hour. For hurricane conditions all
docks should be removed and placed on the ground by the oak tree in
the emergency overflow parking and then tied to the tree to prevent
them blowing away. For winter conditions without ice expected the
outer dock sections can be removed leaving some dock and the ramp
available for winter boat users. If solid ice is expected all
sections should be removed.
Dock Support Equipment
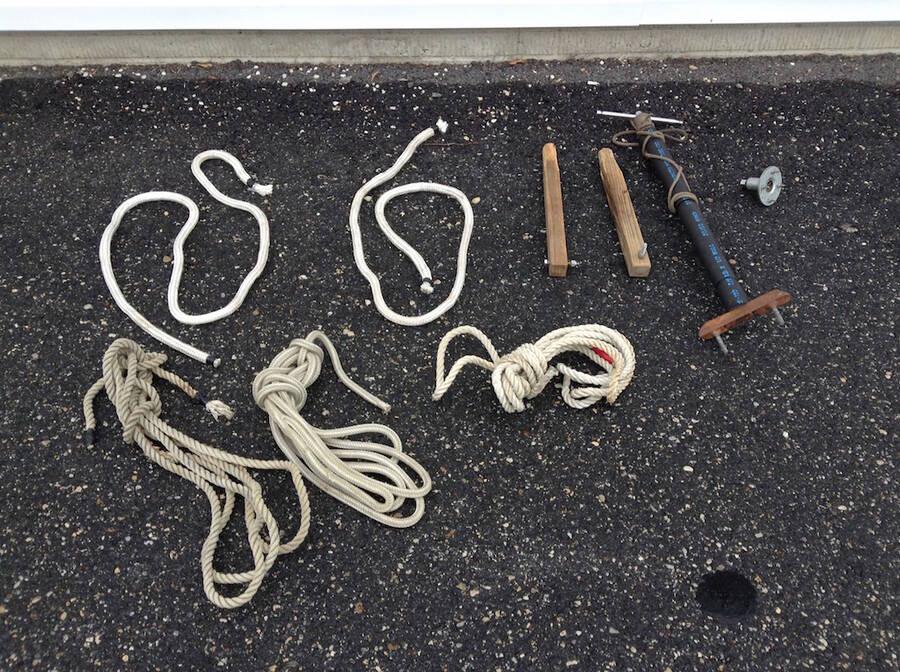
The dock support equipment shown in the following photo:
Floating Dock Support Equipment
Bolt wrench to remove/install the
dock joining bolts. This is a pipe with a Tee on one end with two
pins extending out from the Tee that insert into the holes on the
dock bolt.
Tapered 2x2 for tab alignment during dock assembly.
Socket adaptor to install/remove pipe fittings attaching piling mounts to the dock.
Short lines to tie onto end of dock for pulling onto trailer.
Longer lines to control and move dock sections on water when not attached.
The dock transport equipment shown in the
following photo:
Floating Dock Transport Equipment
two trailers each able to support two dock sections.
pullout boards for stacking on the
trailers. These boards have wood blocks on one end to keep them
from sliding as the second dock section is loaded on top of the
bottom dock section. Barnacles will damage the top surface of the
dock if they are dragged across it, the separation boards prevent
this damage.
Support equipment with no photo:
Channel locks for dock cleat removal
straps to secure dock sections onto the trailers when stacking on trailer
Stacking boards to keep the docks separated when stacked on land. Barnacles will damage the top
surface of the dock if they are dragged across it, the separation boards prevent this damage.
Shown in winter storage below.
Dock Setup
The following sections describe how the docks are set up and operate.
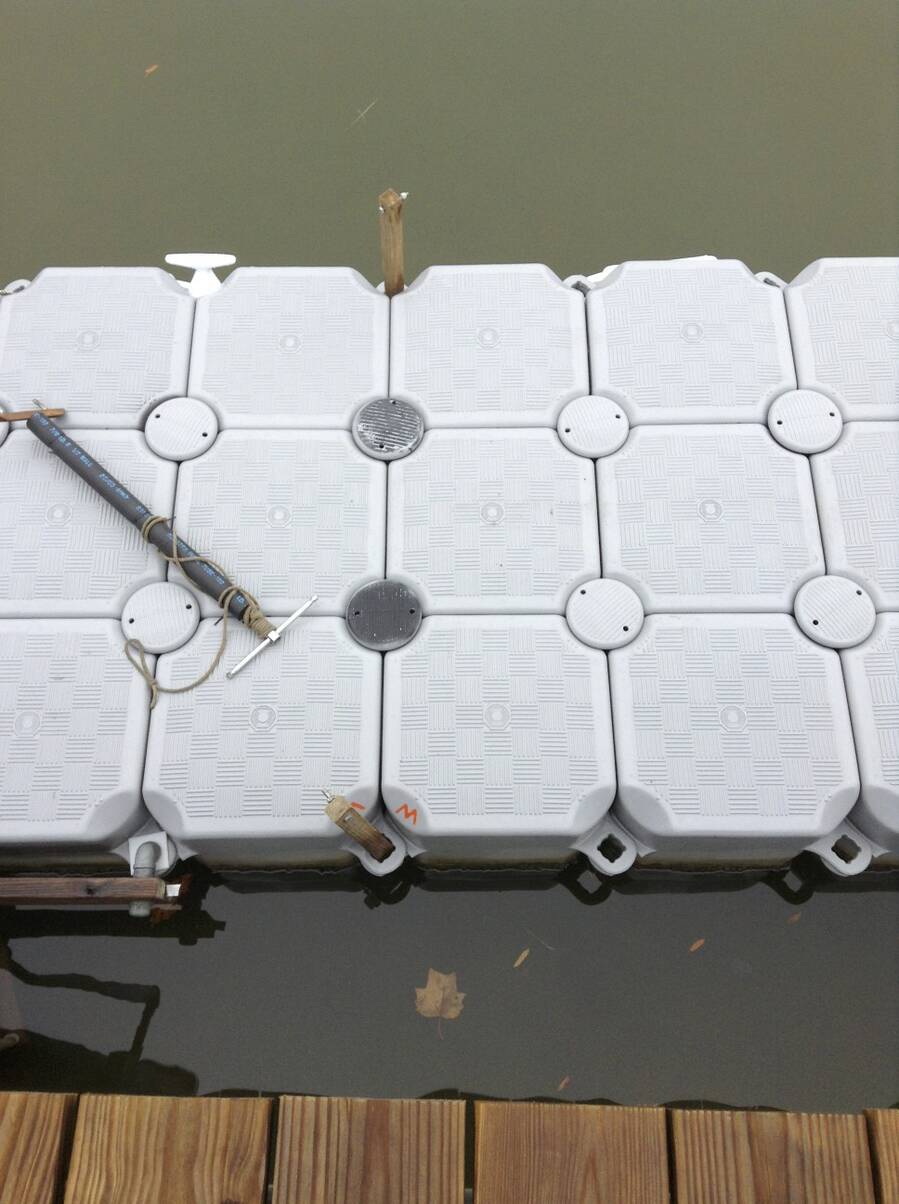
Dock cube connections
The dock is assembled from individual cubes that are bolted
together using a plastic bolt. Each cube has a tab with a hole on
each corner. Each tab on a cube is at a different height on the cube
to allow all four tabs to overlap and have the cubes be flush on top
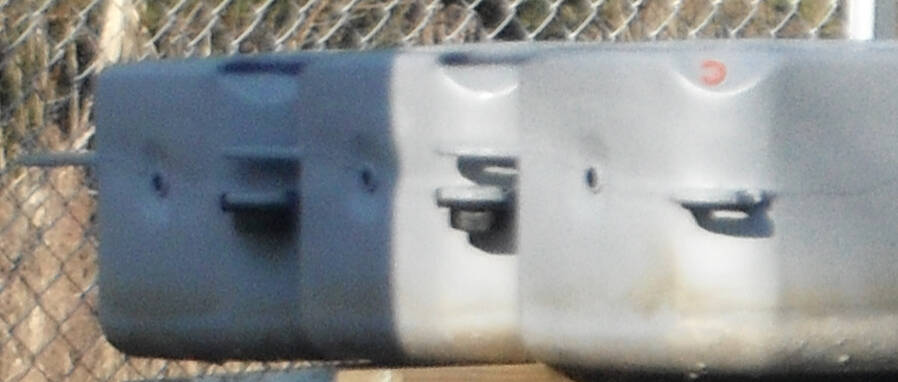
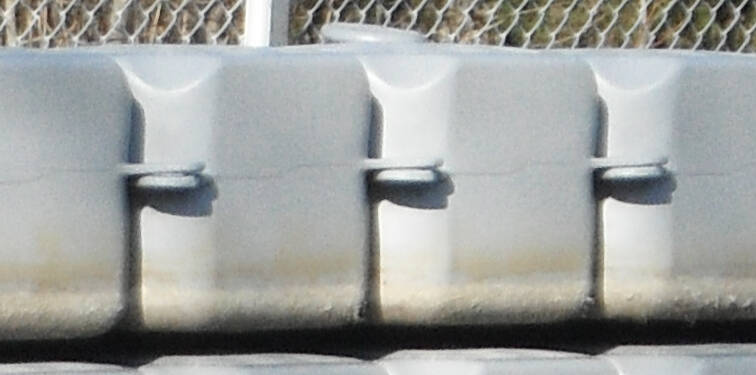
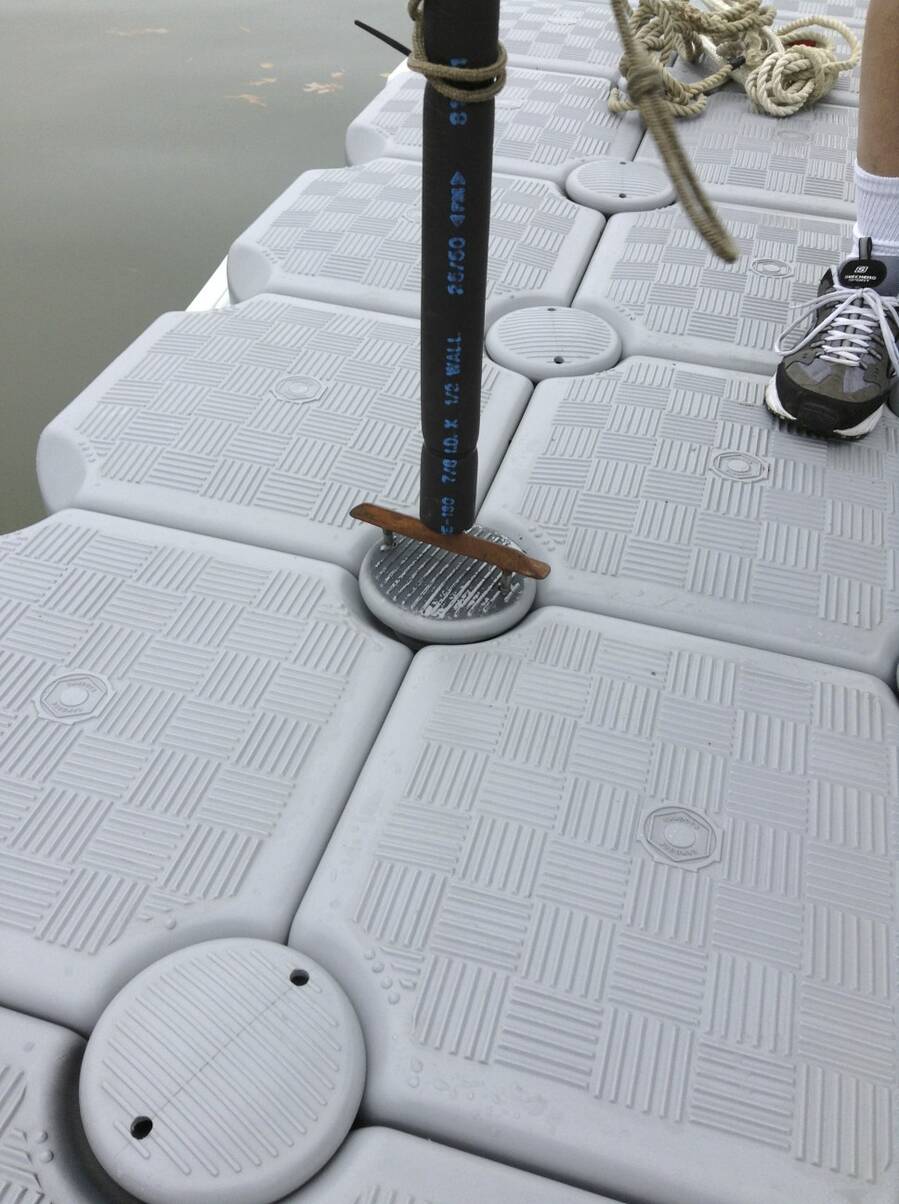
as shown in the following photos. Observe the gap between the middle
tabs in the top photo and the tabs together in the bottom photo.
When assembling the dock you will be standing on the dock which will
cause the tabs to move vertically depending upon where your weight
is. It is important to make sure the tabs are correctly positioned
when assembling to insure the surface of the cubes is smooth to avoid
tripping hazard. Also note in the top photo that the bottom tab has
a slide on nut that the dock bolt will screw into when assembling.
All bottom tabs that will be joined have to have the nut.
Cube Tabs with gapCube Tabs with no gap
The assembly nut is screwed down firmly but not tightened down
hard. There is suppose to be some flexing allowed. If the bolt is
too tight removal will be very difficult due to shells and sand that
work into the joint over the year.
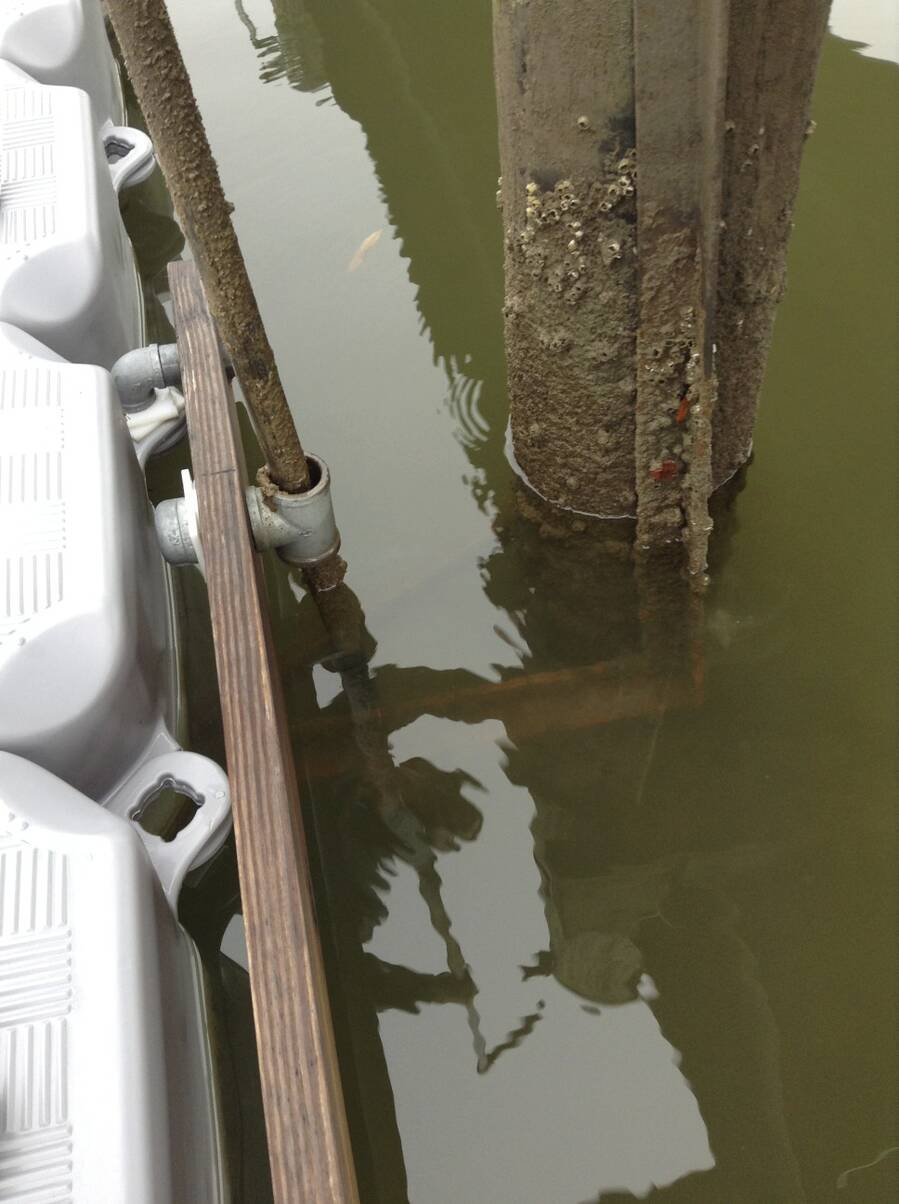
Dock Attachment
The floating dock is attached to the pilings by use of a collar that slides on
a pipe mounted to the piling. The collar is mounted on a 2x6 that is
mounted to the dock. This allows the dock to move with the tide.
The pipe on the piling is mounted into a matching pipe secured into
the piling with a 1/4” bolt to keep it from coming out of the
mount. Below the water attached to the piling is a “A”. Each
pipe is unique and numbered with a roman numeral to the matching
piling coupling. When the dock side collar is replaced it is necessary to insure that the
installation is tight enough to prevent any rocking of the collar or
it will bind on the pipe and keep the dock from moving up or down.
This can create a hazardous condition for any member trying to free
up the bound motion of the dock.
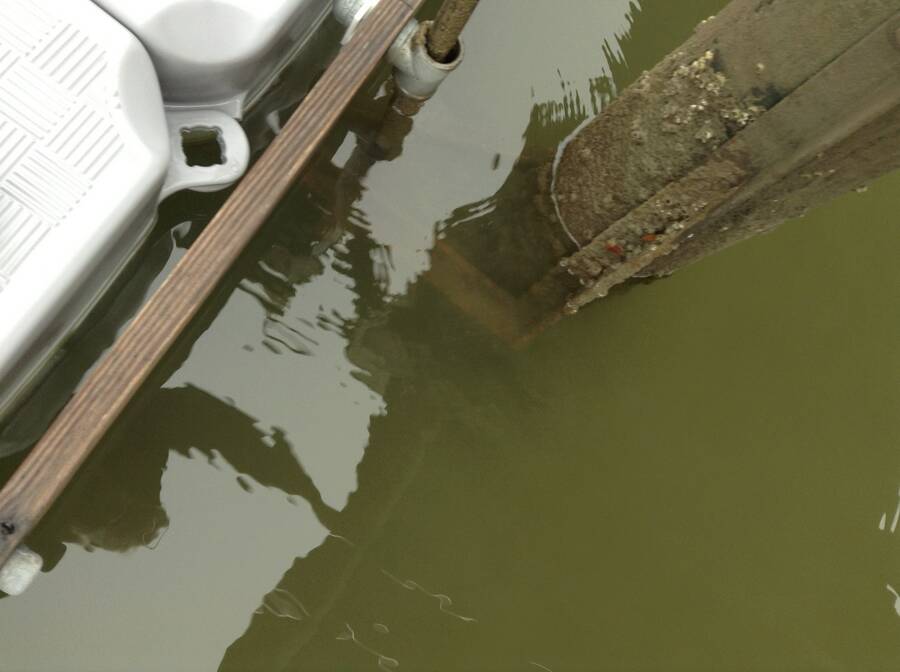
Dock Attachment to Piling
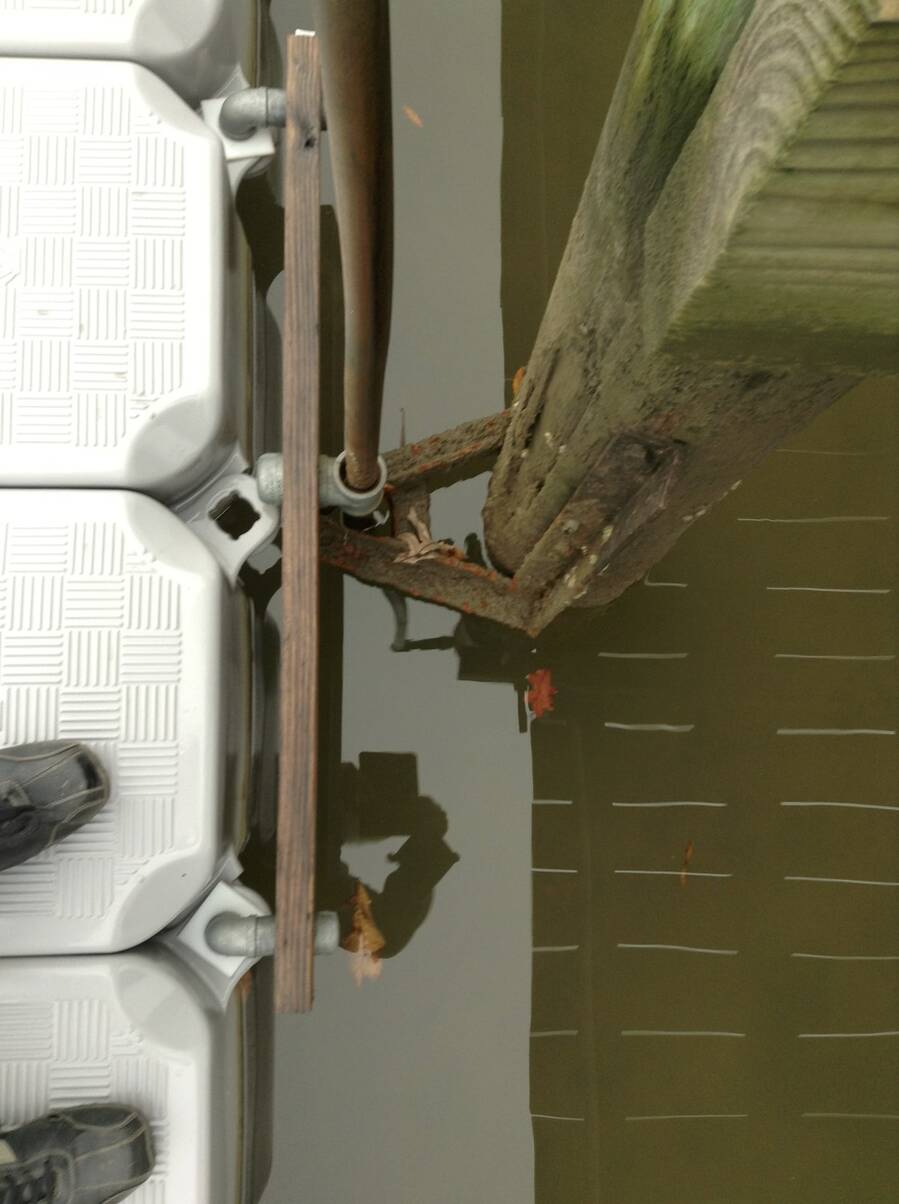
The base of the “A” is
attached to the piling and the vertical pipe goes through the top of
the “A”. The legs of the “A” are angles that extend upward
and the cross of the “A” the angle extends downward.
To install the pipe:
Drop pipe down through the dock fitting and next to the piling under water.
Pipe at piling
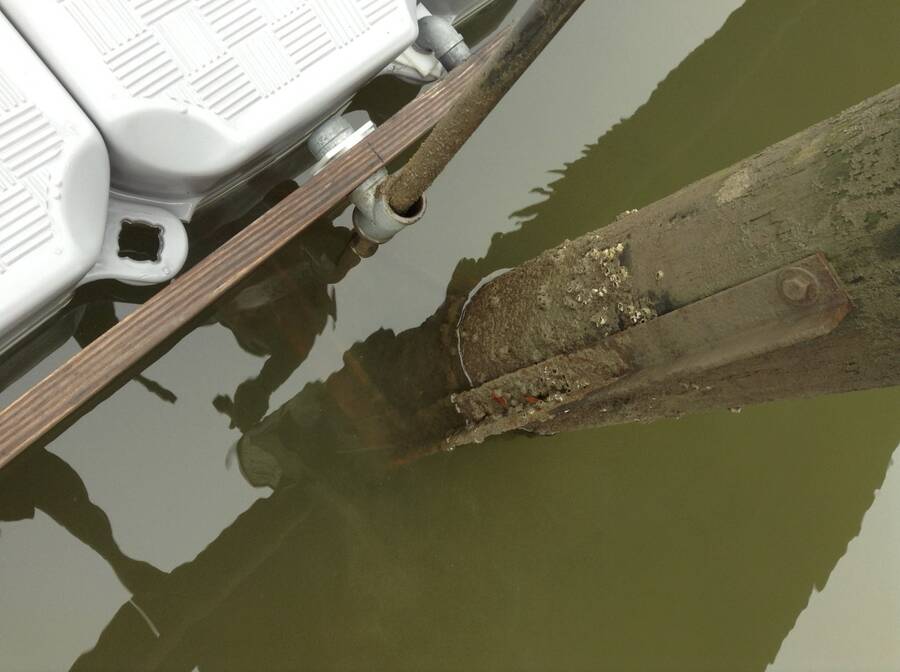
Then move the bottom of the pipe outward until the cross the “A” is hit.
Pipe on top of bar
Lift the pipe until it is on top the the cross of the “A”, it will
not be able to slide outside of the “A” as the legs of the “A”
are higher than the cross of the “A”.
Pipe now captive
Move the pipe outwards until it drops off the cross of the “A”. Move around to make
sure it is now captive in the top of the “A”.
Pipe in socket on piling
Insert the top of the pipe into the piling fitting and install the bolt to secure.
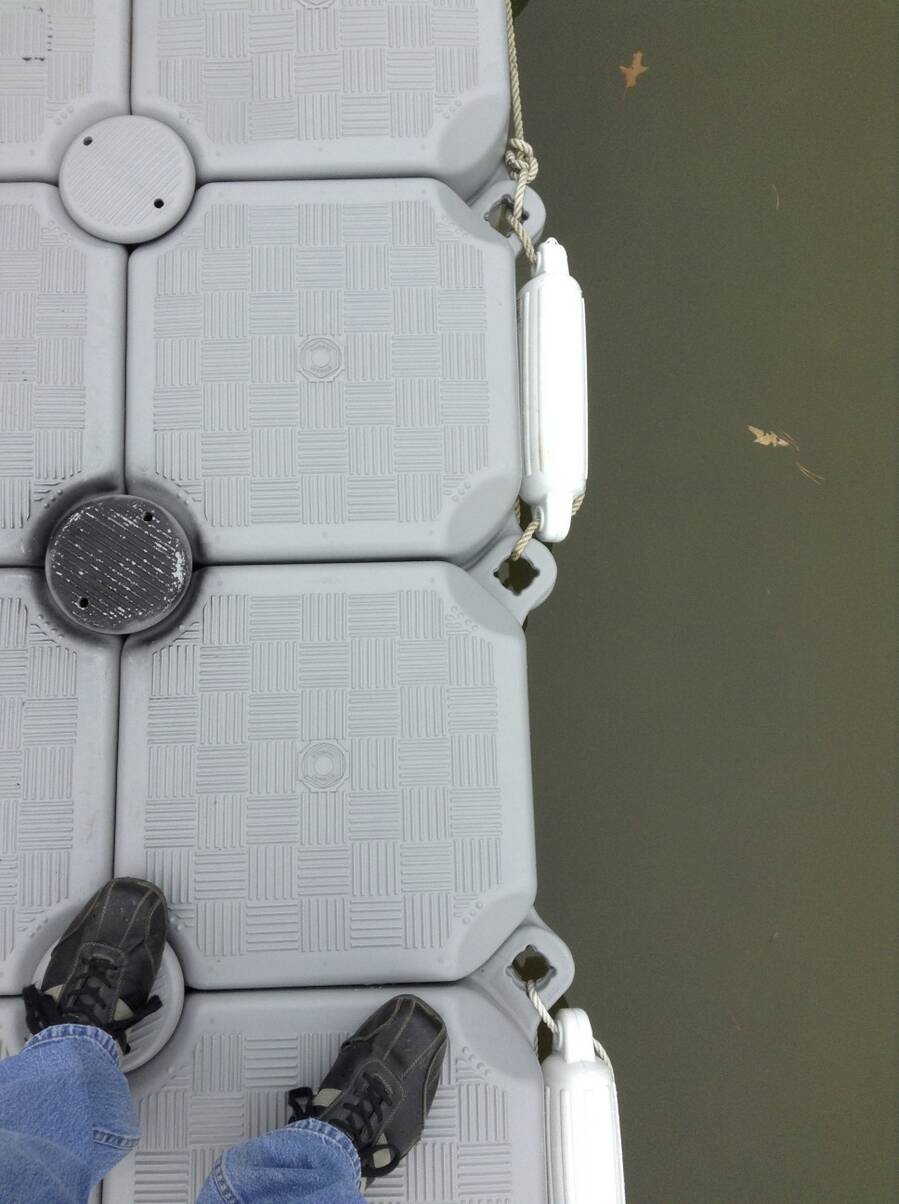
Dock bumper attachment
Bumper attachment
The dock bumpers are installed every other dock cube to protect boats
from tabs on the cube. The lines are run through multiple bumpers
but stop at each dock separation joint to allow dock separation
without having to remove the whole bumper assembly. There is
typically one cube overlap that will have to be untied to separate
the dock sections. When replacing the lines insure that these
termination locations are maintained to ease splitting the dock into
sections for removal.
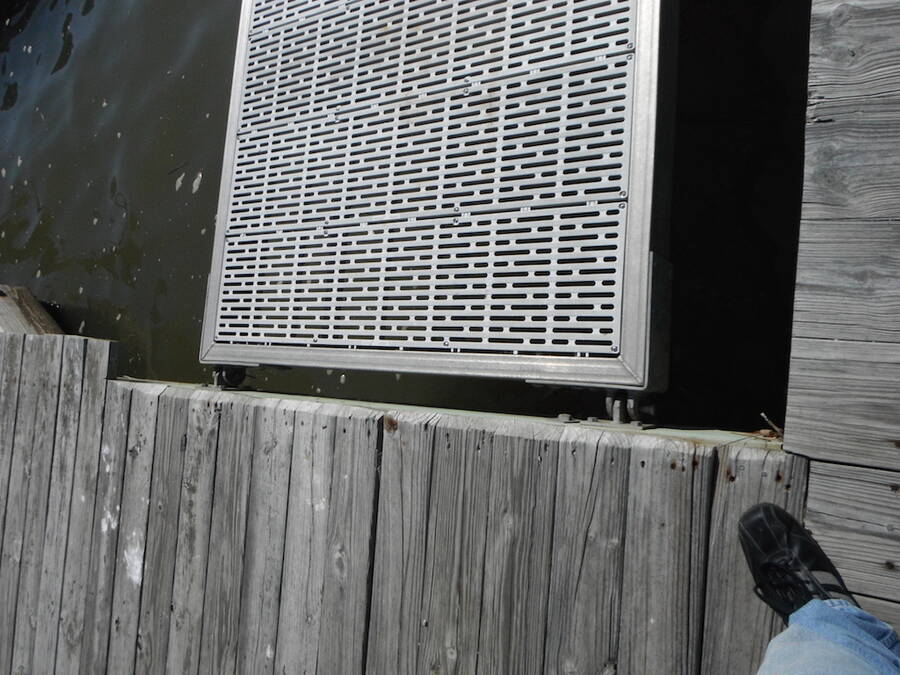
Ramp
The ramp is hinged at the walkway and rolls on the floating dock. There has
to be enough dock under the ramp to prevent the ramp from rolling off
the dock at very low tide which is met by the current dock position
so do not move the dock any further outboard. When
removing the dock the ramp is disconnected and placed on the dock to
avoid having to lift the ramp separately. This reduces manpower and
makes the process quicker and safer.
The ramp is removed by:
Separating the the section of dock under it from the piling
and floating the section all the way under the ramp.
To disconnect the ramp from the walkway remove the pins from the
pivot bolts then two people hold the ramp up with one hand and pull
the pivot bolt with the other and lower the ramp to the dock.
Additional people make it easier but are not needed. Just insure the
bolts come out at the same time.
Reinstall the bolts and pins on the ramp to prevent them from
being lost.
Tie the ramp to the dock and pull the dock section out on the
trailer. The pipes for piling attachment can also be placed on top
of the ramp and tied to the dock at the same time to speed up
removal and securing of the pipes.
Ramp hinge bolts
Dock Removal Process
Dock removal process can be done somewhat in parallel if more
people are present. The dock is disassembled from the outboard end
one piece at a time. Move the disassembled piece inboard and pull
out, the next piece can be separated and prepared for removal while
the prior piece is being pulled out if enough people are present.
Get disassembly equipment from locker 11
Dock bolt wrench
Tie down straps
long lines for moving dock
short lines for winch attachment
dock cart for the dock attachment bolts.
At each applicable dock separation point, marked by the
orange section numbers on the dock and in the dock diagram, untie
the bumper at the joint and retie to leave the bumper line not
spanning the separation joint.
Get tow vehicle connected to trailer. Use the small trailer
for the two short dock sections, the big trailer for the other
sections. So the first trailer to use will be the small trailer.With use of two tow vehicles the docks
can be removed very quickly if there are loading and unloading crews
available.
Preparation for pulling out
Tie one of the short lines to the
center tabs at the end of section to be used to pull the dock onto
the trailer and secure with the winch. Can probably just pull on by
hand but will need to secure with the lower winch when on the
trailer.
Tie a guide line to the outboard end of
the section. For long sections a line at each end is advisable.
The dock will be rotated 180 degrees before pulling out so that the
bumpers are on the dock side of the ramp and the pipe attachments
are outboard at the ramp to prevent catching on the dock causing
damage and injury risk.
Remove the attaching pipe by undoing
the bolt, pushing the pipe out and lifting. Install the bolt into
the pipe to keep from getting lost.
Moving section to trailer
Remove the attachment bolts and place
in dock cart.
Push dock apart
Rotate around and move to ramp with
line. Dock is rotated to keep the mounting board and pipe outboard
to avoid damage to docks during moving and pullout
Back trailer down until top of boards
are in water so that the dock will be able to float onto the
trailer.
Section at trailer
Pull float onto trailer, pull up
trailer by hand or with winch. There are two winches on each
trailer, use the lower winch for the lower dock section and the
upper winch for the stacked dock section if stacking them on the
trailer.
Pull out of water and secure for
additional section pullout or take to destination.
Repeat for other sections with the
following notes:
Loading section onto trailer
For the section with the ramp remove
the ramp using the instructions above under the Ramp description to
get ramp disconnected from dock and secured on the dock before
removing it.
When you untie the diagonal section
from the main dock tie the section to the inside piling to keep it
in location until ready to remove it.
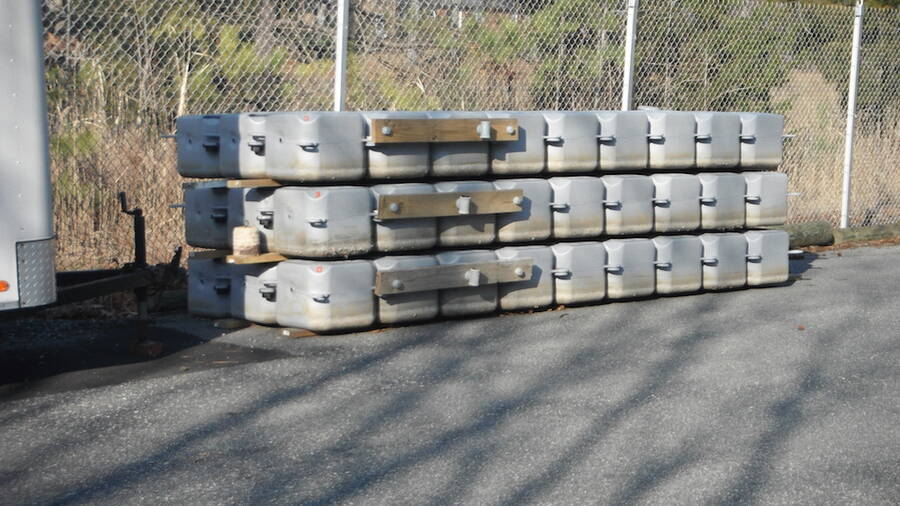
Winter storage
The outer dock sections are stored for winter in 4 long
sections W-C, D-D, D-E and E-end stacked on top of each other in front of the
storage trailer. There should be two boards on the ground under the
first section E-end and two boards separating each section above it.
This is to keep barnacles on the bottom of the float from damaging
top of the section below it, or damaging a section on the asphalt.
The dock sections can be slid from the trailer to the storage
position with little lifting. Correct stacking of the long sections
is shown below:
Sections stacked for winter
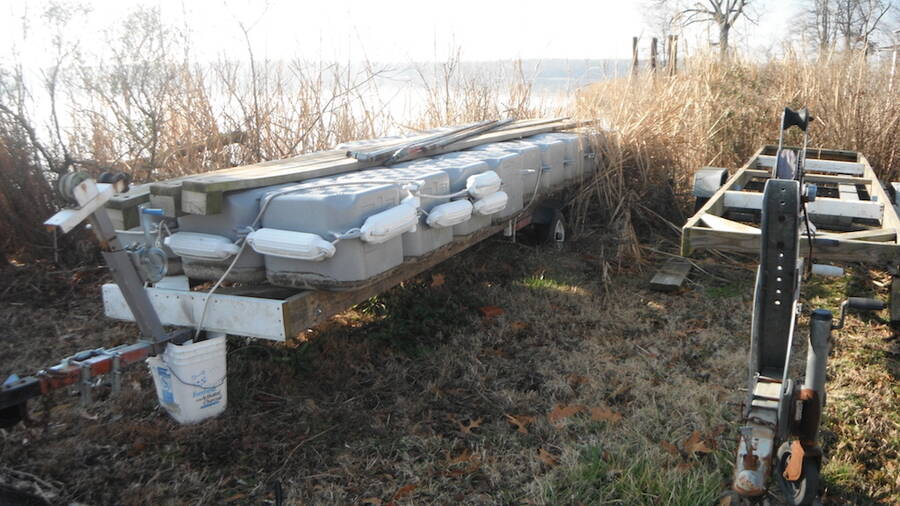
The pipes should be tied to the top of the dock for storage
as shown below:
Small sections on trailer
Dock Installation Process
Dock installation process can be done somewhat in parallel if more
people are present. The dock is installed from the inboard end one
piece at a time.
Get installation equipment from locker 11
Dock bolt wrench
Long lines for moving dock
Dock cart with the dock attachment bolts.
Wood alignment pins
Piling attachment pipes.
All pipes are marked with matching numbers on the piling socket to
insure bolt alignment.
Located the innermost dock piece to install using
the diagram at the top of this document.
Load the piece onto a trailer with the piling
attachment board on the passenger side of the trailer to insure it
is away from the ramp dock.. Tie long lines onto the dock to
control it after launching.
Launch the dock piece.
Float the piece into position turning it 180 degrees in the process.
Align the cube tabs in the correct vertical order
for smooth dock surface. Insert the wood pins in the outer tabs to
hold the dock in place as shown in the photo
Alignment pegs installed
Install the mounting bolts using the wrench. Do not over tighten, just down
flush. There is suppose to be some play in the bolt and over
tightening will result in sand and shells making it difficult to
remove.
Using dock wrench
Install the attachment pipe using the attachment to piling instructions in
previous heading.
Repeat for other dock sections.
If the section has the ramp, move the section and
ramp to the dock where the ramp attaches.
Lift the ramp up and install the attachment
bolts.
Float the dock out under the ramp to the
attachment point and attach the section as all other sections. Do
not allow the dock section to move outward allowing the ramp to
fall off the dock.
Install the bumper sections over the dock joints
to insure a bumper is at ever other cube.
Hurricane storage.
All dock sections shall be removed and placed on the ground in the emergency
overflow grass parking area around the oak tree. After placement all dock sections
shall be tied together and around the oak tree to prevent them from blowing away.
Both pullout trailers shall also be placed in the emergency overflow area. The
boards used for dock stacking and the mounting pipes shall be tied to the trailers
in a secure manner.
Maintenance
The docks are mostly maintenance free but several things should be
done monthly to insure problems do not develop.
Check the dock mounting boards and pipes to insure they are
solid. The boards should not rotate or the tee will bind on the
pipe instead of sliding.
Check the bumpers to make sure they are not damaged or coming
untied
Walk the dock stepping on each cube, especially outboard
cubes. Check for the cube collapsing or hearing air vent. If this
is detected the cube has a hole that will need to be fixed. One
cube has a patch from a propeller cut. After repair it was placed in
the center row to protect it better. Loss of buoyancy in a single
cube does not cause much problem and it can wait until fall for
repair, loss of multiple in a single area will need immediate
correction. The manufacturer no longer makes cubes the size we
have, the new cubes are slightly smaller and are not interchangeable.
Check the joint at the angled dock
If birds are building up a shell collection try to remove it.
Shells will work down into the space around the nuts and make it
harder to remove them. The dock will be better for member use if it
is washed off occasionally.